What is Rockwool?

Many people will have seen Rockwool, or a very close relative of it without realizing. What was once used as insulation for roofing or building projects was found to be an effective growing medium for hydroponics when there was a slight change to its structure.

Rockwool comes under a couple of different names, and one of the common ones being “Stonewool.” This is man-made, and to do this, they take basalt rock, which is an old volcanic rock, and melt it at high temperatures along with limestone.

Once it reaches a molten lava stage, this is spun into fibers much like cotton candy. Once these fibers are made, they add a binder into the mix and compress the resulting material into a mat. From here, it will be cut into a variety of shapes and sizes that meets the needs of hydroponic growers.

Sizes you can often find are slabs, cubes, croutons, granulate blocks and starter plugs. These are found to retain moisture to almost ideal conditions, it will retain oxygen and because of the fine structure, it never impedes the growing of plants rooting systems. Rockwool can actually promote a strong vigorous growth.

What Can I Grow Using Rockwool?

There are all manner of plants and vegetables, which can be grown in Rockwool. While commercial growers use it for germinating lettuce before they transplant them to NFT systems, home growers can use larger Rockwool blocks for growing all manner of leafy greens, herbs, peppers, tomatoes and cucumbers among others.

Growers who use their system for cut flowers find that both Gerberas and Roses grow well when planted in Rockwool.

Once new growers see the benefits of Rockwool, they begin to look at how they can benefit from using it in their garden. For many, the uses do fall down to either germinating seeds, or when cloning new plants, however, larger blocks are more versatile than just using Rockwool starter plugs for this purpose.

No matter what the use, the properties of Rockwool make it an almost perfect growing medium for plants. In comparison to its size, it can hold a large amount of water. This makes it ideal in systems where there are dry periods, and growers don’t want their growing medium to dry out completely.

This feature also acts as a security measure in case there are power outages, or there is a pump or timer failure.

If water retention wasn’t a good enough reason, then the ability to hold almost 20% oxygen between the fibers is. This delivers lots of oxygen to the root zones and makes it hard to actually over water their plants.

Larger 4-inch cubes are used for the bigger plants we saw above, yet the plugs of around 1.5 inches are often used for germination and cloning.

Rockwool makes it easier for new growers, in what could be a stressful time. Using Rockwool, they can keep their seeds damp enough without them sitting in a waterlogged environment.  When it comes to cloning, part of the old plant will be taken from another and planted so it can grow into a new plant all of its own.

This can be a more successful and cheaper way of growing plants for many growers because it will be an identical clone of the original plant, which was the donor.

For this method to be successful there does need to be lots of humidity around the cutting. If it dries out too much, then a plant will revert to self-preservation mode and stop trying to grow new roots.


Any method of growing needs to be in a sterile environment, and the way they manufacture Rockwool means it is 100% inert. The heating process it goes through during the manufacturing process means there is little chance of fungi or bacteria entering into Rockwool.

Steps in Using Rockwool for Planting Seeds

It may appear daunting when planting seeds for the first few times; however, it can be very straightforward and successful when using this growing medium.

Here are the steps to follow when planting seeds.

  1. Rockwool preparation – soak your cubes well in pH adjusted water. They should have a pH of 5.5 to 6.5.
  2. In the hole in the top of the plug, insert two seeds. Using a fine object such as a toothpick push the seeds toward the bottom of the hole.
  3. Pinch the top of the hole closed or cover with a small piece of Rockwool.
  4. Add all your starter plugs to a nursery tray and place a humidity done over the top. Keep the temperature around 70-80 degrees Fahrenheit.
  5. Check every couple of days and make sure the cubes are not drying out. Either water sparingly or mist them with a water bottle.
  6. Once you see your seeds sprouting, remove the plugs from under the dome and place them under your growing lights.
  7. Once you see a dominant seedling, trim back the smaller one to prevent growth. Never try to remove this smaller shoot as it can damage the shoots of the larger seedling.   
  8. Once these reach between two or three inches in height, you can transplant them to your system. When doing so, there is no need to try to remove the starter plug; this can go directly into your growing medium of choice.

Steps for Propagation Using Rockwool in Hydroponics

Propagation of plants can be harder for new growers until they understand where they need to cut from the donor plant. However, the steps for using the Rockwool cubes are no harder than doing so when growing from seeds.

  1. Make sure your Rockwool cubes are soaked will in pH-adjusted water.
  2. Make sure to water your donor plant well the night before you begin propagation
  3. Take the main stem of the donor plant and cut 3 to 4 inches of leaf stem from as close as you can to the main stem of the plant. Be careful not to damage the node.
  4. Take the cut end and dip it into some rooting hormone
  5. Take the cutting and place it into your cube, but make sure it doesn’t start to emerge from the bottom.
  6. Take your nursery tray and half fill with vermiculite of perlite.
  7. Place the cubes on top of this growing medium.
  8. Close the moisture dome to lock in the moisture and maintain a temperature of around 80 degrees Fahrenheit.
  9. Once roots begin emerging, open the lid slightly and increase more the day after.
  10. Remove the dome completely a few days later once the first roots appear.
  11. Once roots are showing through the bottom of the cub, transplant to your system.

Preparing Rockwool for Use

When using Rockwool, it is important to prepare it before use. While there are other growing mediums, which are pH-neutral such as coco coir and clay pebbles (Hydroton), Rockwool has a naturally high pH of around eight.

This occurs because of the limestone that is mixed with the basalt during manufacturing. If you don’t make sure you adjust the medium before use, then this high pH will prevent plants being able to uptake these nutrients.

Plants prefer conditions that are more acidic, hence the adjustment of the pH before use.

The steps for doing so are easy, yet they can be a little time consuming, so allow yourself a few days before you need to use your new batch of Rockwool.

The first step is to soak your cubes in water, which is acidic. This will dissolve the lime, which forms during manufacture. Distilled water is the best option because you know what the pH will be. Water from the faucet can vary depending if you are in a soft or hard water area.

You should adjust the water so the pH drops to around 5.5. If it goes below five, then this can begin damaging the fibers. Once you do this, allow them to soak up this pH-adjusted water for 24-hours. If these blocks are for use in your system, then locate them in position and run your system without plants until your system pH stabilizes at around 5.5 to 6.0.

Things to Do, and What Not to Do With Rockwool

Using Rockwool can be straightforward, and this can be seen from the amount of growers, which use it. However, there are a few things you need to do, and some things you should to gain the full benefits of this growing medium.

Here we will look at all the things you do need to do:

Pre-soaking Rockwool

When you purchase this growing medium, it will feel very light, as it will be very dry. It is crucial to first wet it sufficiently before you use it. To know it is ready for use, you should submerge the medium in water that is balanced to a pH of 5.5 until there are no more bubbles emerging from the blocks.

By this submersion, the water can penetrate all the tiny pores and holes that are on the inside of the medium. While some growers soak for extended periods, it can be enough to be from seconds or minutes for the starter plugs, or several minutes for the larger 4-inch blocks. It is better to leave it as long as you can to be sure it is thoroughly soaked.

Once you have made this pre-soak, then you need to let it stand and drain. Water will flow and then stop, the medium will still be damp as the moisture only comes from the larger pores where it lets oxygen inside. This gives you the ideal water to oxygen ratio for your plants.

Before using for your plants, you should be sure to wet them with your nutrient solution. After the initial drain, the remaining nutrients will be directly available for your plants. Soaking with just water will weaken the nutrient concentration inside the blocks.

Never Unwrap Your Cubes

The larger blocks will come wrapped in a kind of plastic foil. This won’t let any light inside, and it is there for a reason. This has the same function as your other growing pots. Not only will it prevent air pruning by keeping the light out, it will keep the roots inside.

One other reason this covering needs to stay on the block is it helps prevent algae on the sides. In the case of slabs, these will be fully covered. Because you can’t fit these into buckets, you can soak them from the top with your nutrient solution, and after they have stood, you can make drainage holes on the underside.

Make Sure You Have Good Drainage

All plants will absorb more water than nutrients. You will have a buildup of these salts in your growing medium over time if you don’t allow for a full run-off. As your root zones are irrigated, this new solution pushes the previous slats closer to the bottom of the growing medium.

If there isn’t enough drainage or run-off to allow these salts to drain away, it will become unhealthy for your plants. You need to allow between 20 and 30% of the solution volume going in, and draining from the bottom as a maximum. This will help retain the ideal conditions in the plants rooting zone.

Reuse or Recycle Your Rockwool

When you are using horticultural Rockwool, you may read or hear myths, which say you can’t reuse it or recycle it safely after use.

You can in fact use the larger blocks again as long as you are sure there are no roots remaining. These will rot, but you can purchase enzymes that will help get rid of these, and after you do this, you can reuse them again for a different type of crop.

Rockwool in essence is a rock and it can be broken up and added to compost or added directly to soil garden beds. The only area you should be using Rockwool a second time is for starting your plants.

Here are a few things you should never do when growing with Rockwool:

Never Squeeze Rockwool

Because this growing medium retains so much fluid, new growers may be under the impression there is too much water in the block. Growers should never squeeze their blocks to remove excess water. Squeezing removes too much water as well as damaging the structure of the blocks.

The structure is already ideal for plant growth, so all it needs is wetting and letting it drain naturally before use.

Never Over Stack Your Pots with Rockwool

If your system irrigates from the bottom, you should be cautious of how tall your pots are. Water will never wick more than five or six inches, no matter how good the medium is at absorbing water. Gravity will prevent it from rising higher than this. If you are using a bottom feeding system, be sure the tops of your pots are no higher than this.

Top feeding systems are not as much of a problem because the solution waters from the top. This will fill all the fibers sufficiently before it comes to the time to drain.

Rockwool Usage Tips

There are a few things growers should understand before they begin using Rockwool for the first time.

Health Concerns When Using Rockwool 

Because there is such a similarity with home insulation and Rockwool, many growers are led to believe it can be dangerous to inhale any dust or particles.

For any growing medium, it is advisable to wear a mask when handling these in their dry state. This can relieve any discomfort, as can wearing rubber gloves in case there is any skin irritation. The initial soaking should wash away any of these particles, and from that moment, the blocks should always be damp so the particles will never rise into the air.

Preventing Algae on Rockwool

Like any growing medium in a hydroponic system. A surface, which is moist and exposed to light, can be the ideal conditions for algae growth. Many growers know this all too well, and even if it doesn’t cause problems, it doesn’t look very nice.

To prevent this, they may cover the tops of their large Rockwool blocks with dark plastic to stop light hitting the damp surface. This can be the same for any area of your system where light gets to where your solution sits. Tanks, tubing and grow troughs being prime examples.


Why Would I Transplant into Soil?

One of the primary reasons for doing this is to use hydroponics as a means of having a healthy start to an outdoor garden. When outdoor growing seasons begin, there is the choice of growing from seeds, or from seedlings.

Seeds take time and there can be some failure rates encountered, commercially bought seedlings can be expensive and on certain occasions, they can be hard to find.

Any grower, who has an outdoor garden, can take advantage of growing their own seedlings in a fraction of the time so they can make the most of their outdoor garden and the growing season with fewer failures.

These indoor systems can also help alleviate any issues that crop up with the unexpected forces of nature, which can interrupt what should be a successful start to a growing season. Not only that, but using hydroponics to start off your seedlings means you are ready to go as soon as you harvest outside after some slight soil preparation.


It doesn’t matter if you are transplanting out of choice, or because it is essential you do so, there are some things to be wary of. From what can easily be a daunting task can become straightforward for any different hydroponic scenario that you face.

Transplanting Hydroponic Clones and Cuttings

While seeds are an option for gardeners, there is more of a swing toward using cuttings and seedlings, hence the increase in the need for transplanting from a hydroponic system back into soil.

The two most common areas of hydroponics that take place before these transplants are the domed incubation grow trays where small rockwool starter plugs are used, or the more complicated mist propagation systems.

The great news for gardeners is that both of these systems are perfect for outdoor gardeners to use, and are compatible with their soil systems once the seedlings or cuttings have begun to show a good healthy rooting structure.

One primary reason this is a good option apart from getting a kick-start, and missing the chances of bad weather is that growers can over time find an ideal mix of environmental factors, genetics and mix of nutrients. For this reason, many experienced growers preserve the donor plants. Here they can carry on the genetics of the plants and thus they are ensured a level of consistency for good harvests.

One other factor that growers have no need to grow from seeds which could deliver either male or female plants. This is another level of consistency as they will be aware of what they have when they begin growing their seedlings or cuttings.

Steps for Transplanting into Soil

Here are the easy to follow steps for transplanting into soil from your hydroponic system.

  • Take a suitably sized pot, the larger the plant, the bigger the pot you will require. These should be roughly four to six inches wide. Plants being transplanted into soil will need more space for their roots. Give them around four to six inches of space to allow them to grow.
  • Fill it with a growing medium that adds some buffer for your plants until they are ready to be fully transplanted into gardens. Many growers opt for soilless peat mixtures, which have a better pH than planting directly into soil.
  • Make a hole in the center of the pot, which is larger than the plants rooting system, and the starter plug if used. If you have plants, which are growing together, you will need to separate the roots carefully as this can cause plant shock easily.
  • Sprinkle the hole with mycorrhiza. This beneficial fungus helps as a growth enhancer. This helps plants absorb nutrients from soil as it helps to increase the area of absorption.
  • Place the plant in the hole and then cover with additional dirt
  • Once you have planted, you do need to water immediately. Hydroponic plants are accustomed to being watered regularly to help minimize plant shock levels they will experience. You can use a quarter strength nutrient solution in the beginning until they start finding their own nutrients from the earth.
  • After about a week, you can cut back on watering until you only have to water as the top inch of soil is dry.

One you have done this your plants will need to be in areas with plenty of light, yet they may not be directly accustomed to the outside temperatures. There will be a period of hardening off they need to go through for a week before they can last in outdoor temperatures.

Soil Transplanting Tips

If your plant is large, it can help to trim back some of the foliage. This pruning will help the plants, as they don’t need to search for nutrients for more leaves and can start to grow steadily.

Most gardeners who use rockwool cubes or plugs intend to transplant into soil. A gardener that uses the larger cubes around the six-inch size won’t be looking to move plants into an outdoor garden or soil filled pots.

Net pots will be entwined with a plants rooting system if plants are more than a few weeks old. If these do need to be planted in soil, it can be a case of planting the entire net pot as well as the plant. Trying to remove the intricate rooting system can kill the plant.

Plant Shock When Moving into Soil

If you have done everything right, your plants will take hold and begin growing as they should. However, if they are suffering from shock, there are some signs you will notice. This can happen quickly, or it can happen over the first couple of weeks after moving into soil.

Leaves can turn yellow to brown and may wither up and darken. These can fall from the plant with a light touch. At this stage, leaves and stems begin to wilt and dry.

There are some things you can do to try and cure plant shock, yet these may not work in every case.

  • Trimming back the plant by at least one-third can help plants focus on their roots.
  • Keep rooting systems moist is vital. Because there is a difference in the watering, there will be more onus on good drainage through the soil. It can be easy for plants to find themselves in standing water.
  • Add a water and sugar solution. While this isn’t 100% proven, it can help and even if it doesn’t work, it won’t harm your plants.


Any grower who either has a hydroponic system, or is considering one, will see that nutrient mixes are expensive. This leads many growers to make their own, fortunately this sounds much harder than it is in practice.

Before even mixing a single drop, you will need to understand the basics of what goes into these nutrients and how each component works. This is because there are many compounds in a nutrient solution, and these need to be made available to your plants at various stages of their growth.

Whilst not for a complete novice to try, it is possible, and you can save plenty of money on nutrients. All you need is plenty of preparation and some attention to detail.


Basics of Mixing Hydroponic Nutrients

In essence, a plant doesn’t care where it gets its nutrients from, be it man-made, organic, or something you produce in your home. All they care about is that they receive all they need to grow to their full potential.

When grown in soil, plants can be picky and absorb what they want, but in a hydroponic system, it is up to the grower to make sure all these nutrients are available in the correct quantities.

Every single plant requires macronutrients and micronutrients to flourish. However, the required ratios of these will be very different on the types of plants you are growing. There are many differences in these homemade formulas, so making one batch of one type may deliver a different ratio to your next one.

You can make a nutrient solution from nutrient salts, these can be easier to make because you can fine-tune your mixture depending on the weights of salts you add. If using these, you must keep these salts cool and dry, as any moisture absorbed will affect their weight.

One other thing to know is many nutrient solutions come in either 2 or 3 part bottles, so when making your own, in some of the following methods, you will look at making either a batch of two or three solutions.

Another thing to note is you will need measuring spoons, a good set of weighing scales and rubber gloves for the crystalline chemicals in some of the formulas.

Finally, purchased nutrients often come with added pH buffers. Because you are making your own, you will need a digital pH-measuring pen and pH UP, and pH Down solution. While measuring your pH levels, you can find your EC levels will be out of sync, so another device you will need is an EC measuring meter.

Hydroponic Nutrient Mix Formula #1

This is a one-part mix, which has been proven to deliver good results. However, you will need to keep an eye on your plants to make sure they show no signs of deficiencies or nutrient burn.

This formula is sufficient for a 5-gallon container full of water. One thing to note is this formula is intended for non-circulating systems, as they are no longer diluted before adding. This makes them ideal for small systems where you have your roots sitting in the solution such as DWC or raft systems.

If you wish to use this in a circulating system, you will need to scale up the quantities until you have enough solution to fill your tank.

  • Masterblend Tomato 4-18-38: 10 g
  • Calcium Nitrate 15.5-0-0: 10 g
  • Epsom Salt: 5 g

This can be one of the easiest to make and takes very little time. Depending on your plants, this solution will need to be disposed of when you harvest from your systems as the salt/EC levels will increase. If there are any signs of deficiency, you can use one of the later supplementary formulas to deliver some extra nutrition.

Hydroponic Nutrient Mix Formula #2

The DIY nutrient mix needs a few more compounds than the first, but it is still very easy to mix. Once mixed, you just add 10 grams of the liquid for each gallon of water you have in your tank.

  • Potassium nitrate: 255g
  • Calcium Sulfate: 198g 
  • Magnesium Sulfate: 170g
  • Ammonium Sulfate: 43g
  • Monocalcium Sulfate: 113g
  • Iron Sulfate: 1/2 teaspoon

Like other homemade nutrient mixes, make sure you have a container large enough to hold a gallon of water and add each of these salts one by one, and making sure each is dissolved before adding the next.

This will be highly concentrated so only add 10g for each gallon of water in your tank.

All your pH levels and EC levels will need checking after addition. For tomato growers, you can add some of the ‘Farmers Friend Recipe’ or the ‘Gift from the Sea’ mix to deliver a well balanced set of nutrients.

Hydroponic Nutrient Mix Formula #3 Compost Tea Recipe

This is the first homemade nutrient mix that can be classed as organic. It takes a little more effort than others take, but if you have spare space, and then this can really give your plants a growth boost.

The first thing you will need is a compost heap or even better a composting bin. These should be outdoors in case there are any fumes.

  1. When making a compost heap, you should be looking at using half-green waste and half-brown waste. Green waste includes grass cuttings, green leaves, food waste from the kitchen. The brown waste side includes straw or hay, dead leaves, old papers (not shiny magazine paper), wood chippings.
  2. When you have your heap, turn this every few weeks so all the materials can break down and the bacteria will do its work.
  3. When your compost is ready, all you need to do is add two large shovels full to a large 5-gallon bucket. Fill this with water and let it steep for three days.
  4. If you have access to aquarium water all the better, if not try to avoid any chemically treated water. Rainwater is also a good option so begin harvesting when it rains.
  5. Once your mixture has been soaking for three days, all you need to do is pour out the liquid and strain it to remove all traces of your compost sediment. This sediment can be added back on your compost heap.
  6. When it comes to using this liquid, you need to use 1/2 a gallon for every 50 gallons of water in your tank.

While this is good enough to use on its own, you can also add some of the next two recipes or some of the homemade fertilizer or growth booster.

Hydroponic Nutrient Formula #4 The Farmers Friend

By all accounts, a traditional farmer who began his foray into hydroponics created this. With his knowledge, he came up with this following formula that has been well proven while retaining organic elements.

  • Seed meal: 4 lbs.
  • Agricultural lime: 1lb and finely ground
  • Gypsum: 1lb
  • Dolomitic lime: 1lb
  • Bone meal: 1lb
  • Kelp (Seaweed): 1lb – you can use dried, just make sure it is not roasted.

To mix, all you need to do is add the ingredients into 5 gallons of water. Mix these until you have a thin consistency. Not all the ingredients may dissolve, so filtering before using is recommended. 

When it comes to using this nutrient mix, all you need is to add 6-fluid ounces for each 100 gallons of water in your tank.

This mixture is ideal for large systems, so you might need to scale it back to fit a smaller system so you have enough made to use, and not left standing.

Hydroponic Nutrient Formula #5 Gift From the Sea

This can be used as a base recipe, and for a boost, you can add one of the growth enhancers or liquid fertilizers. If you see any signs of deficiency, even the addition of these in small increments to your system can give a good boost in plant growth.

  • Seaweed (Kelp): 6oz
  • Epsom Salts: 5 teaspoons – 1 teaspoon per gallon of water

This formula is super easy to make.

  1. All you need to do is take your seaweed, wrap it in cheesecloth, and tie it with twine. This prevents sediment settling in your water.
  2. Add 5 gallons of water into a bucket and add your seaweed bag.
  3. Leave this sitting in the sun for 5 days
  4. Add the 5 teaspoons of Epsom salts

Either you can add the entire contents into your hydroponic tank, or you can add it in one-gallon increments.

Like all nutrient mixes, you do need to measure your EC and pH levels to be on the safe side. This is even more crucial if you add any of the growth enhancers during your plants growth.

Hydroponic Nutrient Formula #6

The nutrients here make up a three-part general-purpose nutrient mix that covers the vegetative phase, the flowering phase and the third for fruiting. There is also a fourth part, which is added a combined compound rather than individual elements.

These formulas are good for one gallon of each nutrient, so if you plan to scale up, you will need to adjust the quantities accordingly.

Vegetative Stage Nutrient Formulation

  • 6.00 grams – Ca (NO3) 2: Calcium Nitrate
  • 2.42 grams – MgSO4 * 7H2O: Magnesium Sulfate
  • 2.09 grams – KNO3: Potassium Nitrate
  • 1.39 grams – KH2PO4: Monopotassium Phosphate
  • 0.46 grams – K2SO4: Sulfate of Potash
  • 0.40 grams – 7% Fe Chelated Trace Elements – see below

Flowering Stage Nutrient Formula

  • 4.10 grams – Ca (NO3) 2: Calcium Nitrate
  • 2.40 grams – MgSO4 * 7H2O: Magnesium Sulfate
  • 2.80 grams – KNO3: Potassium Nitrate
  • 1.39 grams – KH2PO4: Monopotassium Phosphate
  • 0.46 grams – K2SO4: Sulfate of Potash
  • 0.40 grams – 7% Fe Chelated Trace Elements – see below

Fruiting Stage Nutrient Formula

  • 8.00 grams – Ca (NO3) 2: Calcium Nitrate
  • 2.80 grams – KNO3: Potassium Nitrate
  • 2.40 grams – MgSO4 * 7H2O: Magnesium Sulfate
  • 1.70 grams – K2SO4: Sulfate of Potash
  • 1.39 grams – KH2PO4: Monopotassium Phosphate
  • 0.40 grams – 7% Fe Chelated Trace Elements – see below

Chelated Trace Elements

  • 7.00%  Iron (Fe)
  • 2.00%  Manganese (Mn)
  • 1.30% Boron (B)
  • 0.40%  Zinc (Zn)
  • 0.10% Copper (Cu)
  • 0.06%  Molybdenum  (Mo)

These trace elements need to be added together and mixed to a fine powder in a mortar and pestle before you can add them to your first three mixtures.

How to Mix Your Nutrients

If you are mixing the three mixes in one go, you will need enough containers for each solution. These should be filled with warm water for the number of gallons you are making.

  1. Test your waters pH and the TDS/ PPM before you follow the next steps. Your pH levels will change once you add your compounds. Keep your readings, as you need to find the real concentration after your final reading.
  2. With your measured out salts for each compound, add these one at a time and allow each one to dissolve before adding the next.
  3. Once you have added all your salts, let it stand until it cools fully. This will be around 2-hours.
  4. Once it has cooled, test your pH again and compare it against your initial reading.
  5. Adjust with pH UP or Down until it’s in the correct range for your plants.

With these mixtures, these should be made, so they can add into your reservoir once they have been cooled. You need to take a second EC reading, as you will need to dilute these mixtures before adding them to your tank. This formula is based on the one given by Keith Roberto who is the author of many Hydroponic books.

It may appear complicated with the number of compounds, and may be something to try once you have more experience in mixing.

Homemade Fertilizers and Growth Boosters

While the above nutrients go a long way to delivering all your plants need, they may lack in some areas at some time. This is more the case for the ones, which are readily available to make from simple ingredients.

It isn’t possible to get the same strength each time, so the following additional fertilizers can supplement these to give your plants a much-needed boost.

All the following are very easy to produce and will help your plants grow to their full potential.

Egg Shell Calcium Deficiency Fertilizer

Once made, the solution you get from this preparation is fantastic to deliver extra calcium to plants. All you need to do is finely crush six to eight eggshells in a pestle and mortar.

Add this powder to 1 1/2 liters of water and a few drops of diluted hydrochloric acid (wear gloves). Leave this for 24-hours and then filter the water to remove all traces of the shells. Be sure to test your resulting liquid to make sure the pH is around 5.0.

This can be used and mixed with any other fertilizer, which is rich in nitrogen during the growth stage of your plants. If you use it in the flowering phase, then add it to a fertilizer, which is high in potassium and phosphorus.

You can use this at any time, but be sure to test you pH levels after you have added it to your tank.

Banana Tea Potassium Booster

Potassium is used in every stage of a plants development. Bananas are known to contain the most potassium out of any natural product. Even with the earlier formulations, you can see how important potassium is as it is one of the key NPK compounds.

Potassium helps your plants use the sugars, starches and carbs they absorb. It aids in building up energy reserves, which leads to the building of complex carbs that give plants their structure to stems and leaves.

Banana tea can also deliver crucial amino acids that will be taken up by your plants. To make this, you only need to boil three or four banana skins in a liter of water. To this, you can add a little sugar or molasses, which is recommended. After boiling, let the solution cool and remove the skins.

You can use this in the flowering stage of your plants growth and you should receive around an extra 20% growth depending on your plant types.

Ground Coffee Growth Enhancer

Although you won’t be using the coffee ground themselves, you can use them to make a tea, which is a fantastic addition during the growth stages of your plants. One of the primary reasons the resulting tea is so beneficial is it is slightly acidic, and the acetic bacteria which develop in the waste coffee grounds contain 2% nitrogen (NPK) and plenty of other organic nutrients.

There are two ways you can use these. The first is to add them to your composting bin to add the benefits into the resulting liquid, or you can take the easier route and let the coffee grounds soak in water for 24-hours. You can use the resulting water to add to your tank, and the waste coffee grounds, you can then add to your compost bin.

Brewer’s Yeast Multipurpose Fertilizer

Brewer’s yeast benefits are boasted for humans, but it can also be fantastic as a multipurpose fertilizer for plants. One thing to be cautious of is you use brewer’s yeast and not baking yeast, because the two are very different.

To prepare this, all you need to do is add one small spoon of yeast into a liter of water. Once this dissolves over a short period, it turns into a potassium and phosphorus rich natural fertilizer. This can be one of the simplest fertilizers to produce, and it can give a great helping hand to plants that need a little boost.

Bean Tea

Beans and lentils are rich in Auxins. This helps with root growth as well as for leaves and stems to search out light. In practice, this is what makes your plants grow taller as they try to reach your grow lights.

These auxins have been used for years in a gel to aid root development for seedlings and cuttings. While these were synthetic, they can be found as easy in organic products. Certain beans and lentils are rich in these and a bean or lentil tea that can extract these is very easy to prepare.

Soak your beans in water until they are fully hydrated. You can lightly heat to help extract the compounds.

Once soaked, whisk or blend them until you have a fine paste

Strain the paste until you have a water nutrition rich liquid that contains many auxins. This is ideal for cuttings or roots to promote growth.

Tweaking of Homemade Nutrient Mixes

Because plants are not in soil, they absorb all they need through the minute hairs on the ends of the roots. In theory, it makes it impossible to overfeed your plants when they are grown in a hydroponic system.

Nevertheless, when mixtures are in a too high a concentration of nutrients. Your plants will not be able to absorb sufficient water.

The salts need to be diluted, and if your mixture has too high a concentration, your plant will start shedding water instead of absorbing it. This results in your plants dehydrating themselves as the salts suck the moisture from your plants.

When you begin tweaking formulas, you need to do this with some restraint and caution. If you get it wrong, you can destroy your entire crop.

Here are some of the more common symptoms of nutrient deficiencies in your hydroponic plants.

  • Lack of nitrogen: This produces stunted plants that have large root systems. The leaves will be smaller and a light color. Growth will be slow.
  • Lack of phosphorus: This leads to stunted plants that have dark, dull and leaves that are discolored. Stems will be unusually hard, and they will have a poor root system. You will also see very little branching off.
  • Lack of potassium: Older leaves will yellowing and curl. The new leaves droop, as they get larger. Flowers will be lackluster, and the plant stems will be soft and not able to offer full support.
  • Lack of calcium: This causes roots to under develop, and you will have curled leaf edges.
  • Lack of manganese: This results in weak growth and poor blooming.

Using Homemade Nutrient Mixes

All the above nutrients can be a cost effective way of adding nutrients to your hydroponic system. However, you will need to pay close attention to your plants when you begin using them.

Unless you are using the formulas, which use powdered compounds, you will end up with a different strength each time. This can leave your plants deficient in some areas, but this may be rare. The powdered formulas can lead to nutrient burn if you add too much, so these are the ones you need to pay close attention to.

The other downside of purchasing the powdered elements is the size of bags they often come in. These can last for a long time, and they will need to be kept as dry as possible. Any moisture can quickly ruin a sack of these minerals and turn them into a large solid block.

On the other side, you have the organic homemade ones, and the ‘Gift from the sea’ especially. This may give off a strong odor if it stands for extended periods.

This being said, you can save a small fortune by making your own hydroponic nutrients, and each time you make them, you will learn a little more of how to make them, and use them more effectively.

Two of the most crucial things you need to watch out for is salt build up. You will see this in some systems as the compounds will begin crystalizing on the sides of your pots or on your growing medium. When you flush the system, you need to make sure everything is as clean as possible before re-filling your tank.

The last thing to be wary of is sediment in the solution. This may not be apparent when you first add your nutrients to your tank, but over time, these will be drawn toward your pump in a circulating system.

To prevent clogged pumps, you can purchase cheap water pump bags that will keep your pump clean without blocking any water flow.

Conclusion

Making your own nutrients can be fun as well as beneficial. As mentioned right at the beginning, your plants don’t care from where they get their nutrients. As long as they receive all they need, they will be happy and grow to their full potential.

All of these formulas can deliver bountiful yields once you understand your plant types and what nutrients they are seeking.

While some are intended as an all-in-one nutrient mix, this means you may need to add something extra in the flowering stages. One of the growth enhancers can help in this stage so you have the best crops and harvests without buying bottles of nutrients.


 What is Hydroponics? | An Overview of Hydroponic Systems | The Old Farmer's  Almanac

by Eric Biksa

Carbon Dioxide (CO2) is a colorless, odorless gas that is found in small quantities in the air, and is essential for plant life, without it plants could not survive.

Carbon dioxide is absorbed by the plants and during photosynthesis the CO2 is is split into it’s basic elements, carbon and oxygen. Small amounts of oxygen are used by the plant but most of the oxygen are released back into the atmosphere.The carbon is combined with water (H2O) in the presence of light to form a sugar molecule. The plants then convert the sugar into carbohydrates. When the plant absorbs nutrients (primarily nitrogen from the roots) they are combined with the carbohydrates to form new plant tissue. This process is called photosynthesis. The entire process is only as good as its weakest link. If any of the required ingredients (light, CO2, water and nutrients) are at a level below that which the plant can use for maximum efficiency, the plant will not perform at it’s full potential.In other words, if you inject CO2 into a system that is not receiving enough light or nutrients the results will be disappointing. We here at Hydro-U recommend that CO2 injection should only be done by experienced gardeners with a good working knowledge of their gardening system. Once a gardener is comfortable with the workings of their system and plant growth, CO2 can be a great benefit, however there are a lot of variables involved with using CO2 and beginners can really have their hands full, increasing the likelihood of a disaster (like total death of the entire crop).

There are several conditions that must be met for the plants to be able to use the increased CO2 levels properly. The most important is lighting. Light levels must be very high (more than 20 watts per square foot) or there will be little or no increase in plant growth rates. The plants will like slightly higher temperatures than normal (approx. 3 – 5 degrees higher). The plants will also metabolize water and nutrients faster, so reservoirs may need a little more attention.

Plants can absorb and process very large amounts of CO2. There is usually about 300 to 600 p.p.m. (parts per million) of CO2 in the atmosphere. Most plants can use 1500 p.p.m. in optimum growing conditions. When using elevated levels of CO2 the growth rate can be increased by as much as 100% to 200%. Most studies report increases in the 40% to 50% range.

The ideal situation would be to keep the CO2 levels at optimum at all times. This would require constant injection of low levels of gas (constantly replacing what the plants are using). This is not practical in most situations as venting of the growing environment is often needed to control heat build up. In these cases CO2 injection should be done immediately following venting.

The biggest problem that people encounter when using CO2 is that they get carried away, they think that a little is good so a lot is better….NOT! When CO2 levels approach 2000 p.p.m. most plants will die. High levels of CO2 are also toxic to humans, primarily due to oxygen deficiency. Before injecting CO2 the room should be vented to remove excess CO2 that might be left over from the previous injection, this prevents the build up of CO2 that could harm the plants.

There are several ways to get extra CO2, the two most common are using bottled CO2 and using CO2 generators. These are the automated ways to add CO2 to the growing environment. Getting precise control of the CO2 levels in your growing environment can be rather expensive, CO2 monitors are the best method, these monitors keep a constant reading of the C levels and automatically adds gas when needed. These monitors are fairly expensive so most people opt for a more inexpensive method (like timers).

There are also several “low-tech” ways to increase CO2 levels. Additional information about using all these methods follows:

Using Bottled CO2

There are several ways to introduce CO2 into the growing environment. Probably the most popular method  is to used bottled gas.  This type of CO2 injection consists of  a CO2 tank, a pressure gauge (monitors how much gas is remaining in the tank), a flow meter (to monitor the amount of gas being released), a solenoid valve (turns the flow of gas on and off as needed) and a method of controlling the solenoid valve (a timer or other controller).

To insure that your garden is receiving enough (but not too much) CO2 from your bottled system, I have included the following charts (see below) that can be easily followed to determine how long you need to emit gas to bring the CO2 levels up to 1000 (first chart)p.p.m. or 1500 p.p.m.(second chart). Charts are supplied by Green Air Products.

Carbon Dioxide Flow Chart for Emitter Systems
1000 PPM (B) Flow in Cu. Ft. / Hr.
(A) Cu.Ft.of
Area
10 15 20 25 * 30 *
(C) Time (in minutes)
400 2.4 1.6 1.2 0.9 0.8
600 3.6 2.4 1.8 1.4 1.2
800 4.8 3.2 2.4 1.9 1.6
1000 6.0 4.0 3.0 2.4 2.0
1200 7.2 4.8 3.6 2.9 2.4
1400 8.4 5.6 4.2 3.4 2.8
1600 9.6 6.4 4.8 3.8 3.2
1800 10.8 7.2 5.4 4.3 3.6
2000 13.0 8.0 6.0 4.8 4.0

A. The cubic feet of the enclosure is determined by the formula (L x W x H).

B. Rate of flow as stated on the emitter regulator.

C. The time required to charge the enclosure expressed in minutes.

* NOTE: It has been my experience that if you set the flow meter up above 20 Cu Ft / Hr it can literally freeze up due to the cold created by the expanding gas. It is best to inject the gas slower over a longer time. -The Professor

Carbon Dioxide Flow Chart for Emitter Systems
1500 PPM (B) Flow in Cu. Ft. / Hr.
(A) Cu.Ft.of
Area
10 15 20 25 * 30 *
(C) Time (in minutes)
400 3.6 2.4 1.8 1.4 1.2
600 5.4 3.6 2.7 2.1 1.8
800 7.2 4.8 3.6 2.9 2.4
1000 9.0 6.0 4.5 3.6 3.0
1200 10.8 7.2 5.4 4.4 3.6
1400 12.6 8.4 6.3 5.1 4.2
1600 14.4 9.6 7.2 5.7 4.8
1800 16.2 10.8 8.1 6.5 5.4
2000 19.5 12.0 9.0 7.2 6.0

A. The cubic feet of the enclosure is determined by the formula (L x W x H).

B. Rate of flow as stated on the emitter regulator.

C. The time required to charge the enclosure expressed in minutes.

* NOTE: It has been my experience that if you set the flow meter up above 20  Cu Ft / Hr it can literally freeze up due to the cold created by the expanding gas. It is best to inject the gas slower over a longer time. -The Professor


Using CO2 Generators

Until recently CO2 generators were used primarily by commercial growers, but with the advent of smaller, less expensive units, many hobby growers now use generators. CO2 generators burn either propane or natural gas. They have a pilot light that ignites the gas when  a timer has opened a solenoid valve to release the gas into the system (similar to a gas bar-b-que grill). The generators come in many different sizes.

Producing CO2 with a generator is more cost effective than using bottled CO2. The generators can produce aprox. 26.1 cu. ft. of CO2 per pound of fuel burned.

The generators work very well and are cheaper to operate than the bottled system, however, they burn the fuel so they give off a lot of heat as well as CO2. This may or may not be a problem for you. If you live in a colder climate and you need to add heat to your growing environment than a generator might be just what you need. If you live in a warmer climate you may already be battling the heat and adding more might send you over the top. With devastating effects on your crop.

Another word of caution about CO2 generators: If they are not working properly they can give off Carbon Monoxide (CO) instead of Carbon Dioxide (CO2). Carbon Monoxide is very dangerous! It is deadly even in small doses (CO2 is deadly too, but only in higher concentrations). You should only use top quality generators that have been built specifically for gardening and have been checked out by the manufacturer. When using generators make sure that the flame is burning blue, this means that there is complete combustion and the generator is putting out CO2 and not CO. If the flame is burning yellow or orange there is a problem with the unit. Turn it off immediately and do not use the generator until a qualified service person has fixed it! Yellow or orange flames mean that the combustion is not complete and the main by product will be Carbon Monoxide instead of Carbon Dioxide.

OTHER METHODS OF ADDING CO2

There are several ways to add CO2 to your garden that do not require a lot of expensive equipment. These are not automated so require more “hands-on” attention. Controlling the amount of CO2 is difficult at best with these methods, however there is little chance of accidentally adding too much CO2.

Decomposing organic matter gives off CO2 as a normal bi-product of decomposition. Use materials like leaves, sawdust, manure, hay, etc.This method of generating CO2 is certainly inexpensive, with most materials being free, but it can be kind of gross. Besides being messy there is a possibility of disease and fungus forming in the decomposing material.

The fermentation process also gives off CO2 as part of the natural process (that’s what puts the fizz in beer). Mixing water, sugar and yeast together will cause fermentation to begin and for CO2 to be generated.

Dry ice is solid CO2 that is made by compressing the gas until it “freezes” into a solid mass. CO2 is  a rather unique substance in that it goes directly from a solid to a gas, which means that you can simply set a block of dry ice in your growing environment and it will slowly “boil” off CO2 gas. Dry ice is probably one of the most expensive ways to produce CO2 in your garden.

One pound of dry ice is equal to one pound of liquid CO2 (bottled). One Pound of either is equal to 8.7 cu. ft. of gas.

If you drip vinegar onto backing soda you will produce CO2 as well.

ADDITIONAL INFORMATION

If you would like to know more about using C in your garden there is an excellent book about it called “Gardening Indoors With CO2” by George Van Patten.

There is a lot of good information about CO2 equipment as well as other environmental controllers available at the following link. which is the website for GreenAir Products, which manufactures what most people consider the finest environmental controllers available for hobby gardeners.


Basic Hydroponic Systems and How They Work

There are 6 basic types of hydroponic systems; Wick, Water Culture, Ebb and Flow (Flood & Drain), Drip (recovery or non-recovery), N.F.T. (Nutrient Film Technique) and Aeroponic. There are hundreds of variations on these basic types of systems, but all hydroponic methods are a variation (or combination) of these six. Scroll down this page (or click on the system names) to see drawings and a description of each type of hydroponic system.

WICK SYSTEM


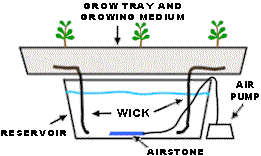
The Wick system is by far the simplest type of hydroponic system. This is a passive system, which means there are no moving parts. The nutrient solution is drawn into the growing medium from the reservoir with a wick. Free plans for a simple wick system are available (click here for plans).

This system can use a variety of growing medium. Perlite, Vermiculite, Pro-Mix and Coconut Fiber are among the most popular.

The biggest draw back of this system is that plants that are large or use large amounts of water may use up the nutrient solution faster than the wick(s) can supply it.

WATER CULTURE


The water culture system is the simplest of all active hydroponic systems. The platform that holds the plants is usually made of Styrofoam and floats directly on the nutrient solution. An air pump supplies air to the air stone that bubbles the nutrient solution and supplies oxygen to the roots of the plants.

Water culture is the system of choice for growing leaf lettuce, which are fast growing water loving plants, making them an ideal choice for this type of hydroponic system. Very few plants other than lettuce will do well in this type of system.

This type of hydroponic system is great for the classroom and is popular with teachers. A very inexpensive system can be made out of an old aquarium or other water tight container. We have free plans and instructions for a simply water culture system (click here for free plans).

The biggest draw back of this kind of system is that it doesn’t work well with large plants or with long-term plants.

EBB & FLOW – (FLOOD AND DRAIN)

The Ebb and Flow system works by temporarily flooding the grow tray with nutrient solution and then draining the solution back into the reservoir. This action is normally done with a submerged pump that is connected to a timer.

When the timer turns the pump on nutrient solution is pumped into the grow tray. When the timer shuts the pump off the nutrient solution flows back into the reservoir. The Timer is set to come on several times a day, depending on the size and type of plants, temperature and humidity and the type of growing medium used.

The Ebb & Flow is a versatile system that can be used with a variety of growing mediums. The entire grow tray can be filled with Grow Rocks, gravel or granular Rockwool. Many people like to use individual pots filled with growing medium, this makes it easier to move plants around or even move them in or out of the system. The main disadvantage of this type of system is that with some types of growing medium (Gravel, Growrocks, Perlite), there is a vulnerability to power outages as well as pump and timer failures. The roots can dry out quickly when the watering cycles are interrupted. This problem can be relieved somewhat by using growing media that retains more water (Rockwool, Vermiculite, coconut fiber or a good soiless mix like Pro-mix or Faffard’s).

DRIP SYSTEMS
RECOVERY / NON-RECOVERY

Drip systems are probably the most widely used type of hydroponic system in the world. Operation is simple, a timer controls a submersed pump. The timer turns the pump on and nutrient solution is dripped onto the base of each plant by a small drip line. In a Recovery Drip System the excess nutrient solution that runs off is collected back in the reservoir for re-use. The Non-Recovery System does not collect the run off.

A recovery system uses nutrient solution a bit more efficiently, as excess solution is reused, this also allows for the use of a more inexpensive timer because a recovery system doesn’t require precise control of the watering cycles. The non-recovery system needs to have a more precise timer so that watering cycles can be adjusted to insure that the plants get enough nutrient solution and the runoff is kept to a minimum.

The non-recovery system requires less maintenance due to the fact that the excess nutrient solution isn’t recycled back into the reservoir, so the nutrient strength and pH of the reservoir will not vary. This means that you can fill the reservoir with pH adjusted nutrient solution and then forget it until you need to mix more. A recovery system can have large shifts in the pH and nutrient strength levels that require periodic checking and adjusting.

N.F.T.
(Nutrient Film Technique)


This is the kind of hydroponic system most people think of when they think about hydroponics. N.F.T. systems have a constant flow of nutrient solution so no timer required for the submersible pump. The nutrient solution is pumped into the growing tray (usually a tube) and flows over the roots of the plants, and then drains back into the reservoir.

There is usually no growing medium used other than air, which saves the expense of replacing the growing medium after every crop. Normally the plant is supported in a small plastic basket with the roots dangling into the nutrient solution.

N.F.T. systems are very susceptible to power outages and pump failures. The roots dry out very rapidly when the flow of nutrient solution is interrupted.

AEROPONIC


The aeroponic system is probably the most high-tech type of hydroponic gardening. Like the N.F.T. system above the growing medium is primarily air. The roots hang in the air and are misted with nutrient solution. The mistings are usually done every few minutes. Because the roots are exposed to the air like the N.F.T. system, the roots will dry out rapidly if the misting cycles are interrupted.
A timer controls the nutrient pump much like other types of hydroponic systems, except the aeroponic system needs a short cycle timer that runs the pump for a few seconds every couple of minutes.


from : https://www.simplyhydro.com/system/

 INTRODUCTION

What is Hydroponic?


Hydroponics is a type of horticulture and a subset of hydroculture, which is a method of growing plants, usually crops, without soil, by using mineral nutrient solutions in an aqueous solvent. Terrestrial plants may be grown with only their roots exposed to the nutritious liquid, or, in addition, the roots may be physically supported by an inert medium such as perlite, gravel, or other substrates Despite inert media, roots can cause changes of the rhizosphere pH and root exudates can affect the rhizosphere biology.

The nutrients used in hydroponic systems can come from many different sources, including (but not limited to) fish excrement, duck manure, purchased chemical fertilizers, or artificial nutrient solutions.

Plants commonly grown hydroponically, on inert media, include tomatoes, peppers, cucumbers, strawberries, lettuces, marijuana, and model plants like Arabidopsis thaliana.

Hydroponics offers many advantages, one of them being a decrease in water usage for agriculture. To grow 1 kilogram (2.2 lb) of tomatoes using intensive farming methods requires 400 liters (88 imp gal; 110 U.S. gal) of water;[citation needed] using hydroponics, 70 liters (15 imp gal; 18 U.S. gal); and only 20 liters (4.4 imp gal; 5.3 U.S. gal) using aeroponics. Since it takes much less water to grow produce, it could be possible in the future for providers in harsh environments with little accessible water to grow their own food.

from https://en.wikipedia.org/wiki/Hydroponics 


Hydroponics is the science of growing plants without soil. If you haven't heard of hydroponics, you may have heard of  "soil-less culture" which is another name often used to describe the same thing. The same natural elements necessary for plant growth in soils are used, with the advantage that your plants are not restricted by weeds or soil-borne pests and diseases. 


The History of Hydroponics

Hydroponic techniques, though they may seem to be a new technology, have been in use for centuries. The earliest known use of hydroponics are the Hanging Gardens of Babylon, the Floating Gardens of Kashmir and the Aztec people of of Mexico who used rafts on shallow lakes to grow plants. Also, hieroglyphic records in Egypt dating back to several hundred years B.C. describe the growing of plants in water. More recently, mobile hydroponic farms have been used to feed soldiers during the Second World War in the South Pacific.

Today, hydroponics is beginning to play a more important role in the world's agricultural production. Increasing populations, climatic changes, lack of water in some areas or poor quality water are all factors influencing the trend towards alternative methods of horticulture. Hydroponics is allowing many to have fresh food where normally they would have to have it shipped in or stored for long periods. A prime example of this is on Naval submarines, where hydroponics is used to supply the crew with fresh fruit and vegetables. Of more benefit is the use of hydroponics in developing countries, where it provides intensive food production in limited areas. The only restraints to a viable hydroponic system is the availability of water and nutrients. In areas where fresh water is not available, desalinated seawater can be used.

Hydroponic gardening has been used commercially since the 1970's, though it was not until recently that it has become more popular for the home grower. The demand in the community for environmental friendly and sound products has been a major factor in this trend. By growing plants in a hydroponic system, you will know exactly what has gone into the plants and can make sure that no harmful pesticides have been used that could damage your own health and the health of the environment.

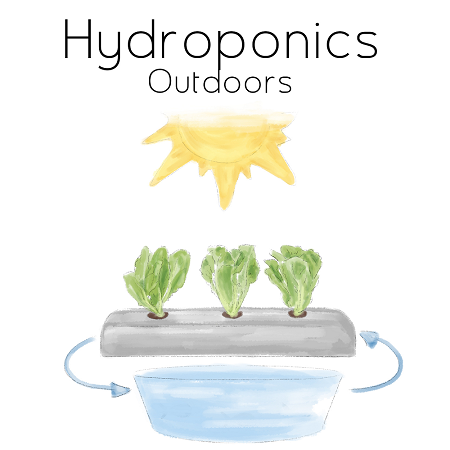
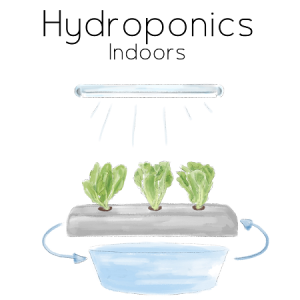
Simple-Hydroponics-Indoors-Aqua-GardeningSimple-Hydroponics-Outdoors-Aqua-Gardening

How Does Hydroponics Work?

Hydroponics is a highly efficient method of growing plants. In soils, nutrients and water are randomly placed, and often plants need to expend a lot of energy to find the water and nutrients by growing roots to find them. By expending this energy, the plants growth is not as fast as it could be. In a hydroponic garden, the nutrients and water are delivered straight to the plants roots, allowing the plants to grow faster, and allowing harvesting to be done sooner, simply because the plants are putting more of their energy into growing above the ground, instead of under it.

Once a plant is established it gives higher than average yields, whether being grown in a greenhouse, a backyard or a balcony. Also, hydroponics allows you to grow more plants per square metre. This is because the plants do not need to compete with weeds and each other for the food and water that is in soil, this food and water is delivered straight to them.\n

It is also very important to note that, despite many myths, plants grown in hydroponics are no different to plants grow in soil, they will have the same physiology. Plants grown in a hydroponic system take the same nutrients as those grown in soil, though the content can be more accurately controlled. The basic difference between the two methods is the way in which nutrients and water are delivered to the plants.

In hydroponics, the nutrient salts are already refined and the plants do not need to wait for the nutrients to break down to their basic form. However, with soil based agriculture, plants are fed nutrients via manures and composts which must break down into their basic form (nutrient salts) before the plants can use them.

Commercially, hydroponic systems often use artificial lighting. This can make the cost of a system much more expensive. If you have sunlight readily available, then this will be unnecessary. If you don't, while the initial costs may be relatively high, many of our customers find that a lighting system, while being necessary, is not the hassle and ongoing expense they may have expected.

Advantages Of Hydroponics

A hydroponic system has the following advantages. Hydroponics allows you to grow plants more efficiently, using in some cases up to 95% less water than soil based horticulture. With many plants, hydroponics will give you a higher quality plant, at a higher yield. Other advantages are as follows:

  • Slightly denser planting, allowing greater use of area you have available
  • Produce looks better and lasts longer
  • Water stress in hot conditions is reduced
  • Suited to non-arable areas
  • Plants reach maturity in much shorter time
  • Soil pests and diseases significantly reduced
  • Hydroponic Gardens require less maintenance

The idea of hydroponics still intimidates some people, mainly because it involves the use of some technology. However, hydroponics is a simple and easy method of growing plants, and is certainly no more difficult than growing plants in soil. We, at Aqua Gardening are experienced with hydroponics and are more than willing to introduce you to this exciting technology and help you get acquainted with it, so that you too may grow your own fresh and healthy plants.

from : https://www.aquagardening.com.au/learn/what-is-hydroponics/